
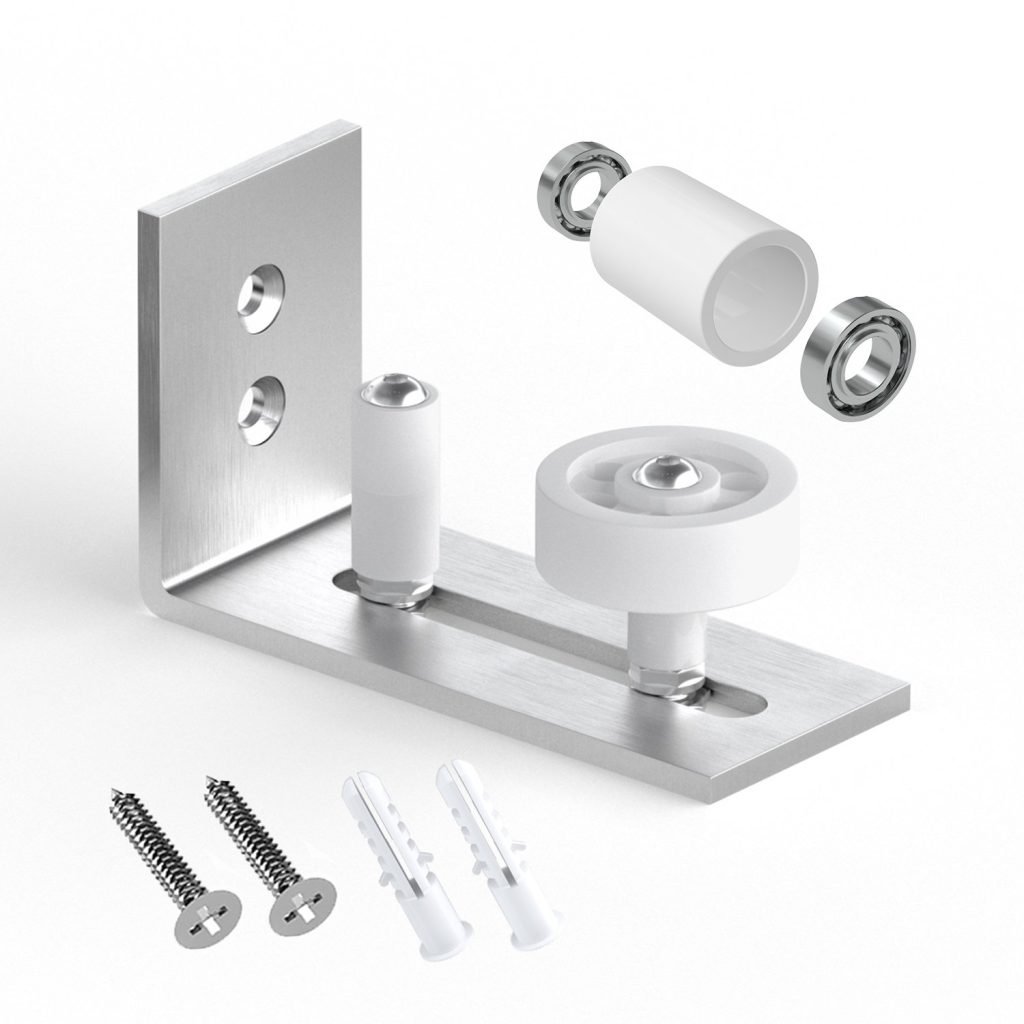
A barn door floor guide controls lateral movement at the door bottom so the sliding panel follows a stable path. Choose one by matching its mounting position and guide geometry to the door bottom, thickness, floor, exposure, and substrate. Install it only after checking full travel, clearance, alignment, and suitable fasteners.
For distributors, importers, hardware brands, and project buyers, that short answer is only the starting point. A guide that looks acceptable in a catalog can still create field complaints if the door profile, mounting surface, fastener substrate, packaging, or inspection method was never defined. This guide explains how to turn the application into an auditable specification without duplicating the commercial assortment on the barn door floor guide category page.
What Does a Barn Door Floor Guide Do?
The bottom guide restrains the door’s side-to-side swing while allowing it to slide along the overhead track. It does not replace a correctly installed track, hangers, anti-jump devices, or end stops. It works as one element in a complete moving system.
That distinction matters in B2B purchasing. Buyers sometimes ask only whether a part is a “barn door guide,” yet identical search language can describe products with different mounting positions and contact geometries. One design may engage a prepared groove under the door. Another may guide the panel between two contact points. A wall-mounted arrangement may be considered where drilling the finished floor is not acceptable, but its backing and alignment still require validation.
The commercial question is therefore not “Which guide is best?” It is “Which guide is compatible with the documented door, site, installation method, and acceptance criteria?”
How Should Buyers Choose a Barn Door Floor Guide?
Start with application evidence, not appearance. Ask for a door-bottom drawing or clear section photo, the actual door thickness range, the finished floor condition, and the substrate receiving the screws. Then determine whether the guide is intended to run in a groove, around the door faces, against an edge, or in another supplier-defined configuration.
Use a selection matrix before requesting samples
The following table is deliberately specification-led. It does not assign unverified dimensions or performance ratings. Buyers should replace “confirm” with project values and attach drawings where tolerances matter.
| Application route | Mounting position | Guide geometry | Door bottom | Door thickness | Floor condition | Exposure | Fastener substrate | Package/QC evidence |
|---|---|---|---|---|---|---|---|---|
| Grooved-panel application | Floor-mounted or as approved in the project drawing | Fin or blade intended to engage a groove | Groove location, width, depth, straightness, and edge integrity must be confirmed | Record nominal value and tolerance from the door drawing | Confirm flatness, finish, drill permission, and hidden services | State indoor, humid, coastal, cleaning-chemical, or other actual condition | Identify concrete, masonry, timber, blocking, or another verified base | Approved sample, dimension report, visual standard, component count, carton marks |
| Ungrooved-panel application | Floor-mounted, wall-mounted, or supplier-defined arrangement | Dual-side, roller, or adjustable contact geometry | Confirm face material, edge profile, protrusions, and whether contact may mark the finish | Record the full production range, not one sample only | Check level changes, rugs, transitions, underfloor systems, and maintenance access | State actual moisture and contaminant exposure | Document the load-bearing base behind the finish layer | Fit test on representative door, adjustment check, fastener list, packing photos |
| Finished-floor-sensitive project | Prefer an approved non-floor-drilling solution where feasible | Geometry must control the panel without unintended rubbing | Confirm the contact zone and required clearance through full travel | Verify compatibility at both tolerance limits | Record whether drilling is prohibited or restricted | State interior/exterior boundary conditions and cleaning regime | Verify wall backing or alternate support; do not rely on finish board alone | Signed installation drawing, substrate note, sample approval, QC photos |
| Distributor or private-label range | Define per SKU; do not mix mounting methods under one item code | Freeze geometry and adjustment method by SKU revision | Define supported door-bottom preparations in the sales sheet | Publish only the approved range after validation | List excluded floor conditions as clearly as compatible ones | Separate exposure options only when material/finish evidence supports them | State that site-selected anchors may be required | Golden sample, BOM, AQL or agreed inspection plan, barcode and carton verification |
A reliable specification also records the allowed contact behavior. Should a roller rotate freely? Should a fixed surface maintain clearance rather than rub? Is a protective strip required? These questions affect noise, marks, and perceived quality, but the answers should come from the approved configuration and test, not from a generic product label.
Distinguish adjustable and fixed geometries
An adjustable guide can help a distributor cover more door thicknesses with fewer SKUs, but “adjustable” does not automatically mean universally compatible. Check adjustment limits against the door tolerance stack, confirm that the locking method remains secure after repeated operating cycles defined by the buyer, and make sure the installer can access the adjustment points.
A fixed guide can simplify installation and inspection when the door preparation is standardized. However, it gives the project less tolerance for variation. For either route, approve the assembly drawing and a representative sample before artwork, packaging, or volume production is released.
Jiansen’s HMDD817 page identifies that SKU as carbon steel and lists a nominal 5 mm thickness. Its listed full set is one floor guide set, two wrenches, and two mounting screws, with a felt strip optional; packaging is stated as poly bag, box, and carton, and OEM/ODM is accepted. Those facts are useful for an initial RFQ, but the page contains inconsistent surface-treatment wording. Do not specify a finish from the page alone: freeze it through a signed sample, approved drawing, and purchase order before production.
Buyers comparing another form factor can also review the HMDD812 product page. Because its current page fields are internally inconsistent, its material, color, thickness, and performance should not be treated as confirmed. Request a current controlled drawing and sample instead.
How Do You Size and Specify the Guide Without Guessing?
Sizing begins with the assembled door system. Measure or obtain controlled drawings after the relevant door construction and finish are known. A nominal door thickness alone may omit veneer, protective edge treatments, decorative overlays, grooves, or local protrusions.
Capture the tolerance stack
Record at least these inputs:
- Door thickness at the actual guide contact zone, including minimum and maximum production tolerance.
- Door-bottom geometry, including any groove and its relationship to the door centerline.
- Designed clearance between the finished floor and door bottom.
- Guide location relative to the opening, closed position, and full travel path.
- Floor slope or local unevenness in the installation zone.
- Track, hanger, and spacer adjustments that can shift the panel laterally.
- Required non-contact clearance or intended roller/contact engagement.
The Frameworks barn door kit and sizing guide illustrates an important general principle: door size and bottom preparation are considered as part of a system, and site measurements should reflect the installed opening. Its dimensions are specific to that manufacturer’s system and must not be copied into a Jiansen specification.
Approve interfaces, not just the standalone part
A supplier drawing should show the guide envelope, mounting-hole pattern, adjustment range if applicable, contact surfaces, material, finish, included hardware, and revision. The buyer’s interface drawing should show the door section, guide location, mounting substrate, floor build-up, and required clearances.
For private-label programs, use a cross-reference table connecting the finished-goods SKU, component BOM revision, drawing revision, packaging artwork revision, and approved sample date. This prevents an apparently small component change from bypassing fit validation.
How Should a Barn Door Bottom Guide Be Installed and Verified?
Installation should follow the approved system instructions and local site requirements. A general sequence is to hang and align the door, identify a guide location that remains engaged throughout travel, mark the mounting points, confirm what lies below or behind the surface, drill only with the appropriate method, secure the guide, adjust it, and cycle-test the door.
An example barn door system instruction manual describes positioning the floor guide where the door slides within it, marking the holes, drilling, and installing the guide. Use that only as a general installation principle; its component dimensions and hardware apply to that manufacturer’s system, not to Jiansen products.
Select fasteners for the real substrate
Fasteners must be selected for the actual substrate; supplied hardware should not be assumed suitable for every substrate. A finished surface may conceal concrete, hollow masonry, timber, metal framing, underfloor heating, waterproofing, or services. The installer must verify the base material and select a fastening system with suitable manufacturer data and site approval.
The Concrete Masonry & Hardscapes Association’s Fasteners for Concrete Masonry explains that fastener choice depends on factors including solid or hollow masonry, edge distance, embedment, loading, vibration, and exposure, and it directs users to the specific fastener manufacturer’s technical data. This supports a substrate-specific process rather than a universal screw assumption.
Run this installation validation checklist
Use the following checklist on the first installation, after any design change, and during project handover where required:
- ☐ Confirm that the door, track, hangers, stops, and anti-jump components match the approved system documents.
- ☐ Verify the guide SKU and drawing revision against the packing label and purchase order.
- ☐ Inspect the guide for deformation, sharp burrs, damaged contact surfaces, or finish defects against the approved visual standard.
- ☐ Check the actual door-bottom profile and thickness at the guide position.
- ☐ Confirm the planned guide location keeps the door engaged from fully closed to fully open.
- ☐ Inspect floor level, transitions, trim, and obstructions across the travel path.
- ☐ Identify the structural substrate and check for concealed services before drilling.
- ☐ Select anchors, screws, drill diameter, embedment, and tightening method from the approved fastener instructions for that substrate.
- ☐ Align the guide with the true door travel path; do not use the wall or floor joint as the only reference.
- ☐ Adjust contact points or rollers so the door is controlled without binding or avoidable surface damage.
- ☐ Tighten locking features using the approved method, then mark or record the setting if the QC plan requires it.
- ☐ Move the door slowly through its complete travel and confirm continuous engagement.
- ☐ Repeat the cycle at normal operating speed and listen for rubbing, impact, or loose components.
- ☐ Verify clearances at both tolerance extremes using representative doors or approved gauges.
- ☐ Record photos, installer sign-off, exceptions, and corrective action for the project file.
Do not convert a successful single installation into an unsupported product-wide load, life, or corrosion claim. Any specific performance requirement should be confirmed through an approved drawing, sample, test plan, and PO.
Maintenance after installation
- Periodically clean the guide contact surfaces and rollers.
- Recheck fasteners and locking features for looseness, and re-tighten them using the approved method.
- Re-run the full-travel test after any adjustment or maintenance work.
What Should an OEM or Wholesale RFQ Include?
A complete RFQ makes quotations comparable and reduces later change disputes. Jiansen or any other supplier should receive the same controlled application data, rather than being asked to infer requirements from a reference photo.
Send this RFQ checklist
- Buyer and market: company, destination market, sales channel, project or distribution use, and responsible approver.
- Product route: floor-mounted, wall-mounted, grooved-door, ungrooved-door, roller, fixed, or adjustable concept.
- Door interface: section drawing, bottom preparation, actual thickness range, contact-zone finish, clearance, and tolerance.
- Site interface: finished floor type, substrate, backing, drilling restrictions, hidden-service controls, and exposure description.
- Controlled specification: material and grade, finish system, critical dimensions and tolerances, edges, contact elements, and approved drawing revision.
- Performance validation: buyer-defined functional checks, cycle protocol if required, acceptance criteria, sample quantity, and test responsibility.
- Fastener scope: whether fasteners are included, their exact specification, intended substrate, required documentation, and any site-supplied exclusions.
- Package contents: guide quantity, tools, screws, optional strips or pads, instructions, spare parts, and component-count method.
- Branding: logo method, label, barcode, warning text, language, artwork ownership, and approval workflow.
- Packaging: inner protection, poly bag or box requirements, master carton, carton marks, drop or transit test requirements if applicable.
- Quality evidence: incoming-material records, first-article report, dimensional report, visual limit sample, functional fit check, packing photos, and inspection plan.
- Commercial fields: target quantity by SKU, quote validity, tooling or setup charges, sample terms, Incoterm, payment terms, production schedule proposal, and change-control process.
- Document hierarchy: purchase order, signed drawing, approved sample, specification, artwork, and agreed precedence if documents conflict.
Do not assume a single MOQ or lead time applies across all guide configurations. Ask for a quote tied to the exact SKU, customization level, packaging, quantity, and approval status. Likewise, do not request generic “compliance certificates” without defining the applicable material, test method, market, responsible laboratory, and document required.
How Should Importers Control OEM Quality?
Quality control should focus on repeatable evidence. Begin with a golden sample or signed limit samples, then define which characteristics are critical to fit, function, appearance, and packaging. Inspection should use calibrated tools appropriate to the tolerance and record the drawing revision reviewed.
Build a practical inspection plan
For incoming or pre-shipment inspection, consider these checkpoints:
- Verify item code, purchase-order revision, and carton labels.
- Count every component in the defined set and segregate optional items from standard contents.
- Check critical dimensions against the signed drawing rather than an uncontrolled web page.
- Inspect geometry, adjustment travel, locking, roller rotation where applicable, edges, and contact surfaces.
- Conduct a fit test with an approved door-section gauge or representative door sample.
- Compare appearance with the signed visual standard under defined lighting.
- Confirm packaging protection prevents part-to-part abrasion and keeps small hardware contained.
- Record nonconformities by defect category and apply the agreed sampling and disposition rules.
If buyers need a broader vendor-audit process, use this guide to verifying a Chinese barn door hardware supplier alongside factory-specific evidence. For projects evaluating related material choices at the system level, the stainless steel barn door hardware wholesale guide provides additional purchasing context. Neither resource removes the need to confirm the exact guide SKU and its documented interfaces.
Where Should Buyers Continue Their Product Search?
Use this article to define the application, installation controls, RFQ, and inspection evidence. Then move to Jiansen’s barn door floor guide product category to review commercially available options and request current product documents. Keeping the guide and category roles separate helps buyers compare products without treating editorial guidance as a binding specification.
Before placing a PO, resolve every discrepancy in favor of controlled documents. The signed drawing, approved sample, agreed QC plan, and purchase order should state the final material, finish, dimensions, included parts, packaging, and acceptance criteria. Specific performance must be confirmed by approved drawing, sample, and PO rather than inferred from a title, photo, or broad category description.
Frequently Asked Questions
What is a barn door floor guide?
A barn door floor guide is a lower guiding component that limits sideways movement while the door slides. It must match the door-bottom geometry, mounting position, thickness range, finished floor, and fastening substrate.
Does every barn door need a bottom guide?
A sliding barn door system normally needs an approved method of controlling lateral movement at the bottom. The exact guide type and location depend on the complete door and hardware system, so follow the approved system drawing and installation instructions.
How do I choose between a grooved and ungrooved door guide?
Choose from the actual door-bottom construction. A grooved guide requires a compatible, correctly located groove; an ungrooved arrangement controls the panel through another approved contact geometry. Validate clearances and full travel with a representative door before ordering volume.
Can I use the screws supplied with a barn door guide on any floor?
No. Fasteners must be selected for the actual substrate; supplied hardware should not be assumed suitable for every substrate. Verify the structural base, concealed services, edge distances, drilling method, and fastener manufacturer’s instructions before installation.
What should an OEM barn door guide sample approval include?
Approve the controlled drawing, material and finish specification, critical dimensions, adjustment and locking method, door fit, full-travel function, visual standard, included components, labels, and packaging. Record the sample date and revision so production can be inspected against the same reference.
What must be confirmed before placing a purchase order?
Confirm the SKU revision, signed drawing, approved sample, material, finish, critical tolerances, intended interfaces, fastener scope, package contents, branding, inspection plan, commercial terms, and document precedence. Any specific performance claim should be tied to agreed evidence and acceptance criteria.
Sources
- Frameworks Manufacturing — Barn Door Kit and Sizing Guide — general system sizing and door-bottom preparation principles.
- Home Depot-hosted Installation Manual — Barn Door System — general floor-guide positioning, marking, drilling, and system installation sequence.
- Concrete Masonry & Hardscapes Association — Fasteners for Concrete Masonry — substrate, edge-distance, embedment, exposure, and manufacturer-data considerations for masonry fasteners.
