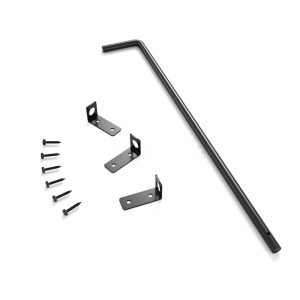
Wood fence gate hardware is best sourced as a coordinated system: specify the gate and post interface first, then match hinges, latches, drop rods, handles, fasteners, finishes, and packaging in one approved bill of materials. Buyers should choose the configuration by gate geometry, timber condition, opening pattern, exposure, installation method, and target inspection plan—not by a component name alone. This category page helps importers, distributors, project suppliers, and OEM buyers compare complete procurement options, prepare an RFQ, approve samples, and control production. For deeper hinge geometry, adjustment, and finish-engineering decisions, use the separate fence hinge engineering and OEM sourcing pillar.
Define the gate hardware system before requesting a quote
A useful RFQ begins with the assembled gate, not an isolated catalog image. Provide a dimensioned gate drawing or a marked-up site sketch showing the leaf width and height, frame or rail arrangement, post section, cladding direction, hinge side, opening direction, required stop position, and the surfaces available for mounting. Identify whether the purchase is a replacement range, a private-label kit, a project schedule, or a standard distributor assortment. Those contexts produce different needs for interchangeability, labeling, and spare components.
Separate functional requirements from commercial preferences. Functional inputs include movement path, latch engagement, ground clearance, mounting access, and compatibility between the fastener and the timber or metal interface. Commercial inputs include assortment structure, carton quantity, barcode placement, language set, artwork ownership, and spare-parts policy. Keeping the two lists distinct makes drawing review faster and prevents a packaging preference from being mistaken for a performance requirement.
Map every interface on the assembly
Mark the connection from gate to hinge, hinge to post, latch to gate, keeper to receiving post, handle to latch, and drop rod to its guide and receiver. For each interface, record substrate, available edge distance, access from one or both sides, expected installation tool, and any obstruction. If a drawing does not show where a screw, bolt, nut, washer, keeper, or guide is installed, the BOM is not yet ready for approval.
Keep component and packaging revisions linked
Use one revision-controlled BOM that connects the component drawing, finish reference, fastener schedule, kit quantity, label file, inner pack, and master carton. A component revision can change bag size, weight distribution, instructions, or carton count. Releasing packaging against an earlier BOM creates avoidable shortages and mixed kits.
Compare wood gate hardware by procurement function
The table below is a sourcing framework rather than a universal product specification. Final selection depends on the buyer-approved drawing, BOM, samples, and inspection criteria.
| Hardware group | Primary procurement function | Key interface inputs | Evidence to approve | Common kit-control risk |
|---|---|---|---|---|
| Hinges | Connect the moving leaf to the post and define the pivot arrangement | Gate construction, post surface, opening direction, fixing access, clearances | Drawing, material and finish declaration, approved sample, fastener schedule | Left/right or component variants mixed in one carton |
| Latches and keepers | Hold the gate in the intended closed position | Gate-to-post gap, closing direction, mounting face, handle relationship | Engagement check on a representative installation fixture | Keeper or screws omitted from the bag |
| Drop rods and cane bolts | Restrain a selected leaf at the receiving surface | Leaf arrangement, rod travel path, guide position, ground receiver detail | Assembly drawing and movement check on the sample | Guide, bracket, or receiver not matched to the rod |
| Handles | Provide the specified operating interface | Hand clearance, latch connection, fixing access, orientation | Visual reference, dimensional check, assembly trial | Orientation or paired quantity incorrect |
| Fasteners | Connect each hardware item to its defined substrate | Timber species or substrate, pilot-hole plan, edge distance, finish pairing | Fastener schedule mapped to every component and bag | Correct count but wrong fastener assigned to an interface |
| Packaging and labels | Protect, identify, count, and route the approved hardware set | Sales channel, barcode data, language, carton count, handling needs | Artwork proof, pack-out sample, carton marks, approved BOM | Artwork revision does not match the packed configuration |
Select hinges without turning the category page into a hinge manual
At category level, the buyer needs to decide how the hinge family fits the complete gate hardware package. Confirm mounting pattern, pivot position, opening direction, adjustment concept if present on the offered design, finish appearance, mating fasteners, and whether components will be sold individually or in a kit. Avoid selecting from a photograph when the gate and post dimensions are not represented.
Detailed decisions about hinge type, geometry, finishes, engineering trade-offs, and OEM drawing inputs belong in the technical fence hinges pillar page. Buyers who need a verified current product example can also review the JL2234 gate hardware set page. That page identifies steel and a zinc plus black powder coating finish. It also lists 2.5/3/2 mm values; map each value to a component on the approved drawing before purchase. Do not infer the mapping from the order in which values appear online.
Treat the verified set as a BOM reference, not a universal template
The currently verified JL2234 web information describes a full set containing 4 gate hinges with 24 screws, 1 latch with handle and 7 screws, and 1 drop rod with 6 screws. It lists polybag plus carton packing. Those facts can support an initial comparison, but the order should still reference the latest approved drawing and BOM. Packaging options and delivery timing must be confirmed in the latest quotation and approved BOM.
Coordinate latches, handles, drop rods, and keepers
Closing hardware must be checked as an interacting group. A latch may fit the gate leaf yet fail to align with its keeper because the post face, gap, stop, or mounting height differs from the sample fixture. A handle may also alter access to screws or change how the operator reaches the latch. Ask the supplier to show all supplied parts in an exploded view and to identify any site-supplied receiver or mounting item.
For latch comparison, the JL1904 fence gate latch page can be used as a product-page reference, while the post latch and strap hinge installation guide helps teams discuss mounting sequence and alignment. These links support discovery; the signed drawing, sample, and BOM remain the order-control documents.
Specify drop-rod interfaces, not only rod identity
For paired leaves or other selected gate arrangements, document which leaf receives the rod, where each guide sits, how the rod moves through its path, and what receives it at the lower interface. Surface slope, debris, seasonal ground movement, and access for drilling or receiver placement should be raised during project review. The wood fence drop rod selection guide provides further selection questions, and the JL1910 cane bolts page provides another product reference.
Control the installation interface before production release
Hardware quality cannot compensate for an undefined installation interface. Include a gate-and-post detail with datum points so the supplier and installer measure from the same references. Show the intended gaps, stops, pilot locations, hinge axis, keeper position, rod guides, and the direction of movement. Where the project has multiple gate constructions, issue a separate interface schedule or clearly identify which dimensions vary.
Run a fit check using representative timber sections and the intended fastener-installation process. Observe whether tools can reach each fixing, whether screw heads interfere with moving parts, whether the latch enters its keeper without forcing, and whether the drop rod travels freely through its guides. Record results with photographs tied to the sample ID and drawing revision. If the site supplies posts, receivers, or some fasteners, state those exclusions on the BOM and carton label where practical.
Plan for wood moisture movement
Wood changes dimension as its moisture condition changes, with the direction and magnitude influenced by species, grain orientation, section, coating, exposure, and local environment. This movement can change gaps, fastener seating, latch alignment, and the relationship between boards and a gate frame. Procurement drawings should therefore identify adjustment allowances or field-alignment steps where the chosen design provides them, rather than assuming the first assembled position will remain unchanged.
The USDA Forest Products Laboratory Wood Handbook is an official technical source for wood–moisture relationships and fastener considerations. Use its principles with project-specific engineering and installation review. The handbook is not a substitute for an approved gate drawing or a site assessment.
Review fastener compatibility at every joint
Create a fastener schedule that identifies the hardware item, substrate, diameter and length shown on the approved drawing, head and drive, quantity, finish or material declaration, washer or nut where applicable, and installation notes. Confirm that the fixing method is appropriate for the available timber section and edge distance. Consider interactions among the fastener, hardware finish, timber treatments, retained moisture, and local exposure. If compatibility has not been verified, request a documented recommendation and approve the resulting schedule before kit production.
Build an RFQ that suppliers can quote consistently
A comparable quotation needs a common data set. Send the same controlled files to each potential source, state which fields are mandatory, and require exceptions to be listed rather than hidden in general notes. Jiansen can review a system-level RFQ covering hinges, latches, drop rods, handles, fasteners, and pack-out, but the buyer should retain approval authority over the released BOM and artwork.
RFQ checklist
- Buyer project name, RFQ number, contact, destination market, and quotation currency.
- Gate and post drawings with revision, units, datums, opening direction, and component mounting faces.
- Requested hardware groups and whether each item is individual, paired, or part of a complete kit.
- Target material and finish requirements only where already validated; otherwise request supplier declarations and options.
- Fastener schedule or a request for a proposed schedule mapped to each installation interface.
- Quantity by SKU or kit, forecast context, call-off structure if relevant, and acceptable over/under policy.
- Sample quantity, sample identification method, approval tests, and required submission documents.
- Inspection characteristics, measurement method, defect categories, sampling plan, and acceptance criteria.
- Individual bag content, spare-parts rule if any, instruction-sheet requirement, and pack-out sequence.
- Label size, barcode data, country-of-origin marking instructions, language, carton marks, and artwork files.
- Required quotation breakdown for tooling, samples, unit price, packaging, inspection, and logistics assumptions.
- List of required documents and a request that the supplier disclose every deviation from the RFQ.
Approve samples against drawings and a controlled BOM
Sample approval should close technical and packaging questions before production release. Assign a unique sample ID and record supplier, date, drawing revision, BOM revision, finish reference, and packaging revision. Retain a signed reference sample or an agreed visual reference where appropriate. Approval language should say exactly what is accepted and should list open actions; an informal message such as “looks fine” is too ambiguous for order control.
Use a staged sample approval process
- Document review: reconcile the proposed drawing, exploded view, BOM, fastener schedule, finish declaration, and packaging specification.
- Component review: verify identity, dimensions listed on the drawing, appearance criteria, moving interfaces, and supplied quantities.
- Assembly trial: mount the set on a representative gate-and-post fixture using the intended sequence and tools.
- Pack-out review: count all pieces, check bag separation, scan barcode data, review instructions, and inspect carton marking.
- Release record: sign the approved revisions, archive photographs and measurements, and list any changes requiring resubmission.
If a production change affects material, dimensions, finish route, sub-supplier, fastener, label, or packaging, define whether a new sample or document approval is required. This change-control rule should appear on the purchase specification rather than relying on memory.
Set a QC plan that measures the ordered configuration
Quality control should translate the drawing and BOM into inspectable characteristics. Classify defects according to their effect on identification, assembly, function, appearance, count, and shipment handling. Define the measurement tool, fixture, sample location, record format, and person responsible for disposition. Avoid vague criteria such as “good quality”; use an approved reference, drawing tolerance, count, or documented check.
A receiving or pre-shipment plan can include SKU and revision identity, component count, critical dimensions on the approved drawing, finish appearance against the agreed reference, operation of moving parts on a defined fixture, thread or fastener fit where applicable, barcode readability, label data, bag sealing, carton quantity, and carton marks. Any destructive or laboratory method should have a separate sample allocation and written interpretation criteria.
Use sampling standards only for their intended purpose
ISO 2859-1:2026 provides official guidance for acceptance sampling procedures by attributes. Buyer and supplier still need to agree the lot definition, inspection level, defect classifications, acceptance quality limit or other plan inputs, switching rules where used, and disposition process. Referencing the document name alone does not define a complete inspection plan.
ISO 9227:2022 describes salt spray test methods. If a buyer requires this method, the specification must identify the specimen preparation, evaluation points, reporting, and agreed acceptance criteria. A result from this accelerated method must not be translated into a field-duration claim.
Specify OEM packaging, labels, and traceability
Packaging is part of the manufactured configuration. Start with the approved component count and define which pieces share a bag, which surfaces require separation, how small fasteners are contained, and how the kit is oriented in the carton. The pack-out instruction should use photographs or a numbered sequence and should show the location of instructions, labels, and any buyer-supplied insert.
Label data may include buyer SKU, supplier item reference, description, quantity, revision or batch reference, barcode content, country-of-origin wording supplied by the buyer, and handling marks. Confirm the exact data owner for every field. Test barcode content from an artwork proof and again from production labels; visual similarity does not prove that encoded data is correct.
Make traceability practical for receiving teams
Choose a traceability unit that the buyer can use during receiving and complaint investigation, such as a production batch or purchase-order line linked to carton marks. Keep inspection records, approved drawings, BOMs, artwork, sample records, and change approvals under the same order reference. Jiansen and the buyer should agree which identifier appears on the product bag, inner pack, master carton, and inspection report.
Evaluate quotations beyond the component price
Normalize quotations before comparison. Check whether each supplier included the same hinge, latch, handle, rod, fastener count, finish route, labeling, inner packaging, master-carton configuration, sample work, inspection scope, and documentation. A lower component price can be offset by omitted pieces, repacking, relabeling, or field sorting.
Review quotation assumptions and exclusions line by line. Require the supplier to flag substitutions and unresolved mappings. For the verified JL2234 reference, for example, the online 2.5/3/2 mm values require component mapping on the approved drawing; a buyer should not price-compare those values as though their assignments were already confirmed. Freeze the commercial comparison only after technical exceptions are visible.
Keep category procurement intent separate from hinge engineering
This wood fence gate hardware category supports buyers who need a coordinated sourcing package: hinges, latches, drop rods, handles, fasteners, packaging, samples, and QC. The broader fence and gate hardware category helps procurement teams explore adjacent product groups. This page should remain focused on wood-gate system procurement and kit control.
The hinge pillar page answers deeper technical questions about hinge families, geometry, finish selection, and OEM hinge sourcing. Maintaining that separation helps a buyer move from engineering research to category comparison without duplicating the same decision guide on two URLs. Link to the pillar when hinge engineering depth is needed, then return here to assemble the complete RFQ and pack-out specification.
Use this buyer workflow from shortlist to shipment
- Define the gate, post, opening, mounting, timber, and site interfaces.
- Select the required hardware groups and identify every supplied and site-supplied part.
- Issue a revision-controlled RFQ with drawings, BOM fields, inspection needs, and packaging data.
- Resolve supplier deviations and map every listed dimension or thickness value to a drawing component.
- Approve documents, physical samples, assembly fit, and pack-out using recorded evidence.
- Release production against signed revisions and require change notification.
- Inspect product identity, dimensions, operation, counts, labeling, and cartons under the agreed plan.
- Retain order, batch, sample, and inspection records for receiving and repeat orders.
This sequence gives B2B buyers a defensible basis for comparing suppliers and controlling a multi-component gate kit. It also keeps claims tied to approved evidence rather than assumptions from product names or photographs.
Frequently asked questions about wood fence gate hardware sourcing
What should be included in a wood fence gate hardware RFQ?
Include gate and post drawings, opening direction, mounting surfaces, required hinges, latch, handle, drop rod, fasteners, quantities, finish requirements, sample plan, inspection criteria, packaging, label data, and required documents. Ask the supplier to list every deviation and map each component to the proposed BOM.
Should hinges and latches be sourced as one kit?
They can be sourced as one controlled kit when the approved BOM, installation interfaces, fastener allocation, and pack-out are clear. A kit can simplify counting and distribution, but buyers should still approve each component and its relationship to the gate and post.
How should buyers account for wood moisture movement?
Document timber condition, gate construction, seasonal exposure, clearances, and any adjustment or field-alignment steps provided by the selected design. Review fastener seating and latch alignment on a representative fixture, and use project-specific engineering rather than assuming wood dimensions will remain unchanged.
What must be checked during sample approval?
Check the drawing and BOM revision, component identity, mapped dimensions, finish reference, supplied quantities, fastener schedule, assembly fit, movement and engagement, barcode data, instructions, bag contents, and carton marks. Record the approved sample ID and any open actions in writing.
How should an OEM buyer define quality inspection?
Convert the approved drawing and BOM into measurable checks for identity, dimensions, appearance, operation, fastener fit, component count, labels, bags, and cartons. Agree defect classes, lot definition, sampling inputs, acceptance criteria, records, and the process for handling nonconforming product.
Does a salt spray test predict outdoor service duration?
No. ISO 9227:2022 describes an accelerated salt spray test method. If specified, buyers must agree specimen preparation, evaluation points, reporting, and acceptance criteria, and must not convert the result into a field-duration claim.