
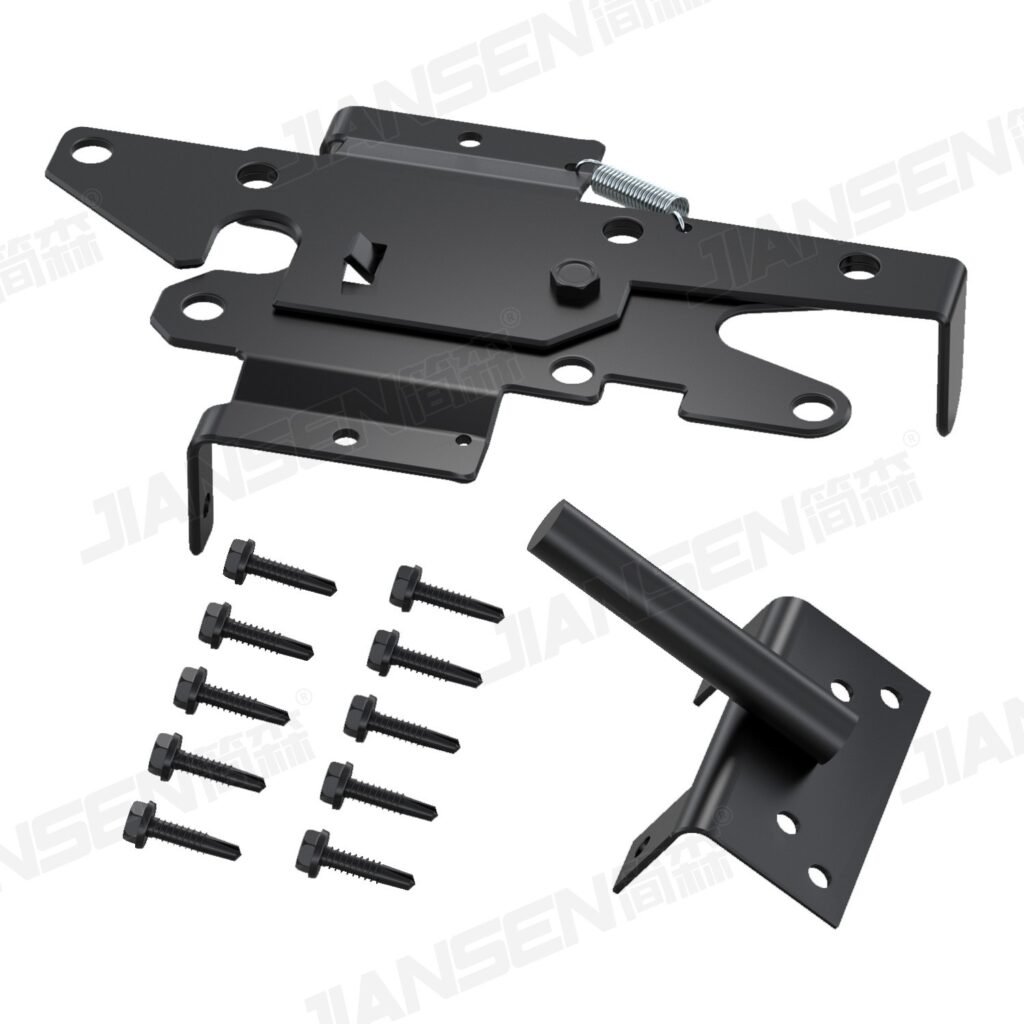
Direct answer: A reliable gate latch installation starts only after the gate, hinges, post, and final closed position have been commissioned. Procurement teams should issue a controlled installation brief defining the gate interface, latch-and-keeper relationship, fastener assumptions, alignment method, acceptance checks, and records required from the installer. Do not copy hole locations from a catalog photograph or use the latch to pull a sagging gate into position.
This guide is for importers, distributors, project buyers, quality teams, and installation supervisors. It covers installation planning and commissioning rather than latch style selection or general fence-hardware sourcing. Buyers can review Jiansen’s fence gate hardware category for component context, then use the workflow below to control a project-specific installation.
Define the installation interface before ordering
A latch does not operate alone. Its function depends on the gate leaf, hinge axis, post stiffness, closing stop, clearances, keeper geometry, mounting faces, fasteners, and user action. The RFQ should describe those interfaces as measured facts. Avoid labels such as “heavy duty,” “weatherproof,” or “universal” unless the supplier links the term to a defined requirement and evidence for the exact quoted configuration.
Record the gate and post conditions
Provide a dimensioned drawing or measurement sheet showing gate width, height, thickness, measured mass, frame and infill materials, post section, reinforcement, facing material, edge distances, hinge arrangement, swing direction, and intended closed position. State whether each mounting face is solid, hollow, layered, welded, or accessible from the reverse side. Note trim, caps, nearby rails, handles, automation equipment, and any obstruction that limits tool or fastener access.
Field measurements should be tied to named datums. Identify the hinge-side post face, gate top edge, and intended latch centerline rather than sending isolated dimensions. Photographs can supplement the drawing, but they cannot establish hidden reinforcement, substrate thickness, or fastener access.
Define the user and operating scenario
State who operates the gate, from which side, and whether one-handed release, padlocking, key operation, self-latching, or access control is required. Identify expected opening frequency and whether wind, vibration, gate impact, debris, frost, or settlement could disturb alignment. If an accessibility, pool-barrier, fire, security, or workplace rule applies, the buyer’s qualified professional must define the requirement and verify the installed assembly; a component name alone does not establish compliance.
Build an installation-ready RFQ
The quotation package should separate buyer inputs from supplier outputs. Jiansen can discuss component options and drawing requirements, but the buyer should request confirmation for the exact latch, keeper, finish, accessories, and pack instead of assuming that every catalog option applies to every model.
| RFQ field | Buyer input | Supplier or installer output |
|---|---|---|
| Gate interface | Materials, dimensions, measured mass, post section, reinforcement, swing, and clearances | Interface review, open questions, and proposed mounting arrangement |
| Latch function | Manual or automatic engagement, release side, lock provision, and required user action | Exact model, keeper relationship, included parts, and operating description |
| Mounting | Accessible faces, substrate thickness, edge limits, and drilling or welding constraints | Hole pattern, fastener proposal, backing assumptions, and installation drawing |
| Exposure | Indoor, ordinary outdoor, coastal, industrial, washdown, chemical, or freeze-thaw context | Material and finish proposal for body, pin, spring, keeper, and fasteners |
| Acceptance | Inspection stages, functional checks, records, defect handling, and responsible parties | Sample plan, inspection method, evidence list, and deviation process |
| Commercial pack | Requested quantity, set contents, labels, barcode, instructions, carton marks, and destination | Revision-controlled BOM, packing layout, quotation terms, and schedule for confirmation |
Ask for controlled documents
Request a drawing with critical dimensions, a bill of materials, an included-parts list, finish callouts, an installation-instruction revision, and a packing specification. Where a test or standard is required, name the method, specimen configuration, acceptance criteria, and report to be supplied. A standards reference is not permission to claim certification or compliance without product-specific evidence.
Keep unresolved fields visible
Use “to be confirmed” rather than allowing a missing value to become an assumption. Assign an owner and due date to each unresolved interface. The quotation should state its assumptions, exclusions, drawing revision, and sample status. If the supplier proposes another keeper, fastener, finish, or mounting arrangement, the change should be returned for documented review before the buyer approves it.
Commission the gate before locating the latch
Inspect the supporting gate system first. Posts should be stable, the frame should be undamaged, and the hinges should allow movement without binding. Confirm the intended gap and closed position. A latch must not be used to correct a distorted post, inadequate reinforcement, loose hinge, or sagging gate.
Check hinge movement and the closing stop
Move the gate through its full intended arc and observe clearances, hinge motion, frame flex, fastener movement, and every point of contact. Allow the gate to settle at the planned closed position several times. If the assembly includes a physical stop, confirm that the stop—not the latch body—takes unintended closing impact unless the approved design says otherwise.
For broader sequencing context, compare the existing wooden fence gate hardware installation guide. That page covers a complete wooden gate system; this guide adds a latch-specific procurement, commissioning, evidence, and acceptance workflow.
Dry-fit the latch and keeper
Keep the gate supported and hold the latch and keeper at the proposed locations. Check engagement depth, release travel, hand access, lock clearance, fastener edge distance, available backing, and interference with rails or trim. Cycle the loose arrangement by hand before marking holes. Record the approved position from the drawing datum so another installer can reproduce it.
Install without introducing alignment errors
Follow the approved product instruction and project method statement. Isolate the area, control the gate against movement, wear task-appropriate protective equipment, and inspect tools before use. The official OSHA hand and power tools guidance gives general workplace principles; the employer and competent installer remain responsible for the actual safe-work procedure.
Prepare mounting faces and pilot features
Verify marks against the drawing before drilling, cutting, or welding. Confirm hidden services and reinforcement. Use a suitable drill, bit, clamp, backing method, and corrosion-repair procedure for the actual material. Remove burrs and contamination. If a coating is breached, apply only the documented repair system compatible with the specified finish. Do not improvise hole sizes or substitute fasteners without approval.
Control fasteners and tightening
The installation record should identify fastener type, diameter, length, material, finish, washer or backing arrangement, and tightening method. Those values must come from the approved design or supplier documentation, not from this general guide. Tighten in a sequence that seats the parts without distorting the latch or keeper. Recheck alignment after final tightening because mounting faces can move as the joint is secured.
Commission function with repeatable checks
Operate the gate from multiple open positions using the normal closing action. The latch should enter the keeper without lifting the gate, slamming, or requiring side force. Confirm full engagement, deliberate release, required hand clearance, and compatibility with any lock or secondary restraint. Observe whether wind or frame movement changes the closed relationship.
Use an installation acceptance checklist
- Gate and post match the approved drawing and measured-condition record.
- Hinges move freely and hold the intended position without the latch correcting misalignment.
- Latch, keeper, accessories, and fasteners match the approved BOM and revision.
- Mounting faces are sound; hole positions, edge conditions, backing, and finish repairs are accepted.
- Latch engages and releases repeatedly without binding, scraping, partial capture, or forced gate movement.
- Release access, lock interface, pinch-point review, and project-specific safety requirements are accepted by the responsible party.
- All deviations, adjustments, photographs, and measurements are recorded before handover.
A buyer evaluating a component can use the JL1904 fence gate latch page as a model reference, but the current quotation, approved drawing, and sample control the supplied configuration.
Record failures without masking them
If engagement is inconsistent, stop and identify whether the cause is gate position, hinge movement, post movement, keeper location, part geometry, fastener seating, or damage. Do not enlarge holes or bend components as an undocumented correction. Record the symptom, condition, photographs, measurements, containment, disposition, and approver. Repeat acceptance checks after an authorized correction.
Approve a representative sample before volume installation
For repeat projects, install the proposed production sample on a representative gate and post. Identify the sample, drawing revision, BOM, finish, fasteners, and every known departure from production. Do not approve appearance alone. The trial should reproduce relevant alignment, mounting access, closing action, and environmental interfaces.
Freeze a golden installation record
Capture final coordinates, photographs, fastener arrangement, adjustment state, functional observations, accepted deviations, and responsible approvals. Link the record to the purchase order and installation-instruction revision. If a part, finish, hole pattern, gate construction, or fastener changes, reopen the affected review rather than carrying approval forward silently.
Separate sample approval from production release
A fitted sample can confirm the proposed interface, but production release also requires controlled documents, component identity, packaging, inspection criteria, and change management. State which sample characteristics are visual boundaries and which are measurable requirements. A sample from another gate construction or finish should not automatically approve the current order.
Translate commissioning into receiving inspection
Before installers arrive, receiving teams should verify item identity, quantity, drawing revision, component completeness, visible condition, critical dimensions, moving-part operation, finish appearance, labels, instructions, and packaging. Segregate mixed or unapproved revisions. Define how nonconforming material will be identified, reviewed, reworked, or replaced.
Request evidence instead of performance adjectives
Ask for records tied to the exact ordered model and configuration. If corrosion testing is specified, ASTM B117 describes operation of salt-spray apparatus, but a test result does not automatically predict outdoor life. If hardware standards are relevant, consult the official ANSI/BHMA standards directory and require a product-specific report before making a compliance statement.
For accessible routes, the U.S. Access Board guide for doors, doorways, and gates explains applicable scoping concepts. Project professionals must determine the actual requirement and evaluate the complete installed opening.
Use a receiving checklist tied to the PO
- Purchase-order line, SKU, supplier lot, drawing revision, and pack revision match.
- Latch body, keeper, accessories, and fastener quantities match the approved BOM.
- Critical dimensions and hole pattern are checked by the buyer-approved method.
- Moving parts operate without visible damage or obstruction before installation.
- Finish condition is compared with the defined acceptance boundary.
- Labels, barcode data, instructions, protective materials, and carton marks match approved files.
- Nonconforming units are identified and prevented from reaching installation.
Send a complete installer handoff pack
The final handoff should include the approved drawing, BOM, latch and keeper identification, installation instruction, gate and post data, fastener schedule, safe-work controls, inspection checklist, golden-sample record, permitted adjustments, finish-repair method, and escalation contacts. State who may approve a deviation and how records return to the buyer.
For adjacent sourcing decisions, the fence hinge types, finishes, and OEM sourcing guide explains hinge selection. Keeping that selection intent separate from this latch installation and commissioning workflow helps each URL answer a distinct procurement question.
Frequently asked questions
What information should a gate latch installation brief include?
Include the gate and post materials, gate dimensions and measured mass, swing direction, intended closed position, latch model, mounting drawings, fastener and backing plan, user scenario, exposure, inspection method, and acceptance responsibility. Mark every unknown as subject to supplier or installer confirmation.
Should the latch position be marked before the hinges are commissioned?
No. First commission the gate so it swings freely and rests consistently at the intended closed position. Then hold the latch and keeper in their functional relationship, verify engagement and release, and mark the approved mounting locations.
Can a product photograph define the correct fasteners?
No. A photograph does not confirm substrate thickness, internal reinforcement, edge distance, access behind the mounting face, or the fastener grade and finish. The installer should use the approved drawing and a project-specific fastener schedule.
How should an installer check latch alignment?
Close the gate gently from several starting positions and observe whether the latch enters the keeper without lifting, forcing, or side loading. Check full engagement, release, clearances, and repeatability, then record any adjustment made.
Does a successful sample installation approve production automatically?
Not unless the sample, drawing, bill of materials, finish, fasteners, gate interface, and acceptance record match the production configuration. Any change should be reviewed through the agreed change-control process.
What should receiving inspection check before installation?
Confirm item identity, quantity, revision, component completeness, visible condition, critical dimensions, hole pattern, moving-part operation, finish appearance, packaging, labels, and the presence of required drawings or instructions.
Can corrosion-test hours predict outdoor service life?
No. Accelerated corrosion methods define controlled test conditions, but a result does not by itself predict service life in every climate or installation. Specify the method, specimen condition, duration, evaluation criteria, and exact tested configuration in the purchase agreement.
Authoritative references
- U.S. Access Board — Doors, Doorways, and Gates
- Occupational Safety and Health Administration — Hand and Power Tools
- ASTM International — ASTM B117
- Builders Hardware Manufacturers Association — ANSI/BHMA Standards
Jiansen recommends that each order retain a revision-controlled RFQ, approved interface drawing, representative installation record, and receiving checklist. These documents make supplier comparison and installer acceptance more reliable without turning unverified assumptions into product claims.
